Workflow Integration How to Create Actions in Embed Workflow

How to Create Actions in Embed Workflow
What are Actions?
An action is something that happens when a workflow runs. Think of it as a pre-configured API call that your users can customize through a simple form interface. Actions can perform tasks like sending messages, creating records, or updating data in your systems. The power of actions is that they abstract away the complexity of API calls, making it easy for your users to automate tasks without needing to understand the technical details.
Step-by-Step Guide
1. Access the Action Builder
To create a new action:
- Log into Embed Workflow
- Click ‘Actions’ in the top menu
- Click the ‘New Action’ button


2. Configure Basic Settings
Once in the action builder:
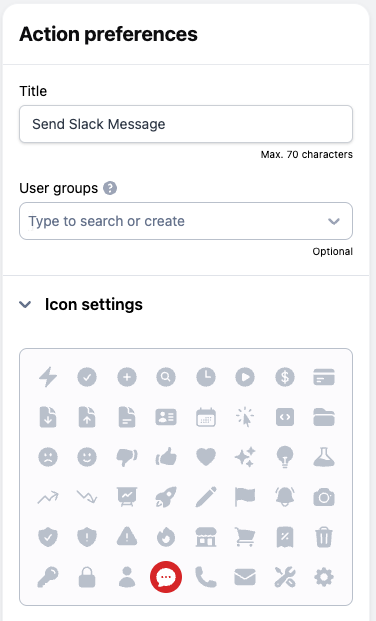
- Name your action (e.g., “Send Slack Message”)
- Select an appropriate icon to represent your action
3. Configure API Settings
The Settings tab is where you configure the API details:
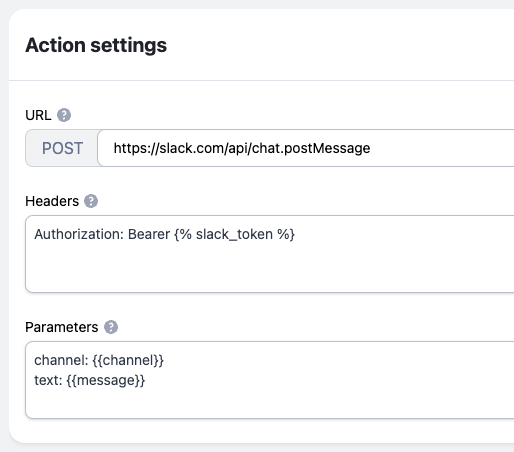
URL
Enter the API endpoint URL:
https://slack.com/api/chat.postMessage
Headers
Add required headers:
Authorization: Bearer {% slack_token %}
Content-Type: application/json
Parameters
Set the parameters that will be sent to the API:
channel: {{channel}}
text: {{message}}
Variable Types in Settings
When configuring your API settings, you can use different types of variables:
{variable}- Regular variables that connect to action form fields- Dynamic variables that can change
{% sensitive_variable %}- Secure variables for sensitive data like API tokens
4. Create the Action Form
Switch to the Action Form tab to create the user interface:
Adding Form Fields
-
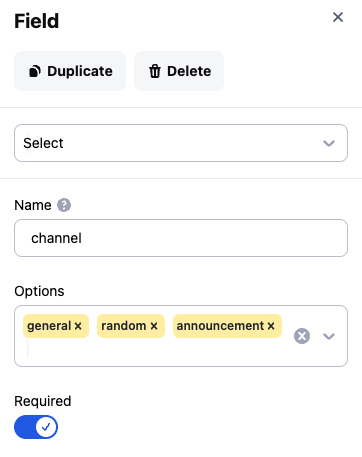
Channel Field:
- Click “Add Field”
- Select type: “select”
- Name: “channel”
- Add options: “general”, “random”, “announcements”
- Mark as required
-
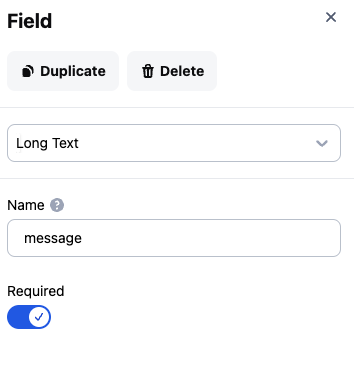
Message Field:
- Click “Add Field”
- Select type: “long text”
- Name: “message”
- Description: “Enter your Slack message”
- Mark as required
Available Input Types
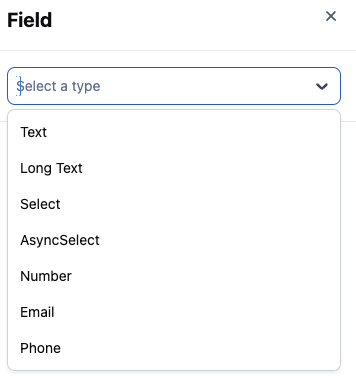
When creating form fields, you can choose from:
- Text
- Long text
- Select
- Number
- Phone
4. Save the Action
Click the “Publish changes” button to make it available for your users.
Example Use Case
Let’s walk through how this Slack message action would work in practice:
- A user creates a workflow triggered by new customer registrations
- They add this Slack message action to the workflow
- In the action form, they can:
- Select a specific channel
- Create a message like: “New customer
{trigger.customer_name}has registered!”
The result: Every time a new customer registers, a customized message is automatically sent to the selected Slack channel.
Tips
- Keep your action names clear and descriptive
- Use appropriate input types for different kinds of data
- Add helpful descriptions to form fields
- Use secure variables for sensitive information like API tokens
- Test your action with sample data before making it available to users