Automate Your CRM How Embed Workflow Enhances Your App A Demo with Pipeline CRM

How Embed Workflow Enhances Your App: A Demo with Pipeline CRM
Say goodbye to manual processes and hello to seamless automation. With Embed Workflow, integrating powerful workflows into your app has never been easier—or smarter. In this demo, we’ll showcase how effortlessly Embed Workflow can supercharge your app’s capabilities.
Imagine enhancing applications like Pipeline CRM with cutting-edge automation that saves time, boosts efficiency, and elevates user experience.
By the end of this demo, you’ll witness how Embed Workflow streamlines automation, showing you exactly how to configure workflows and test them in real-time.
Why Embed Workflow is a Game-Changer
Unparalleled Benefits for Your App
- Quick Integration: Easily connect with any app that provides an API.
- Next-Level User Experience: Empower users with automation features without additional complexity.
- Scalable Growth: Easily scale automations as your business grows.
- Time-Saving: Reduce manual effort by automating key processes.
Step 1: Lightning-Fast Integration with Embed Workflow
Adding Embed Workflow to your app is a breeze. All it takes is a single line of HTML to unlock a world of automation possibilities.
<script src="https://embedworkflow.com/widget.js" data-api-key="YOUR_API_KEY"></script>
Once integrated, Embed Workflow is ready to revolutionize the way you create and manage workflows. For this demo, we’ll explore its full potential via the Embed Workflow web interface.
Step 2: Building a Dynamic Workflow in Embed Workflow
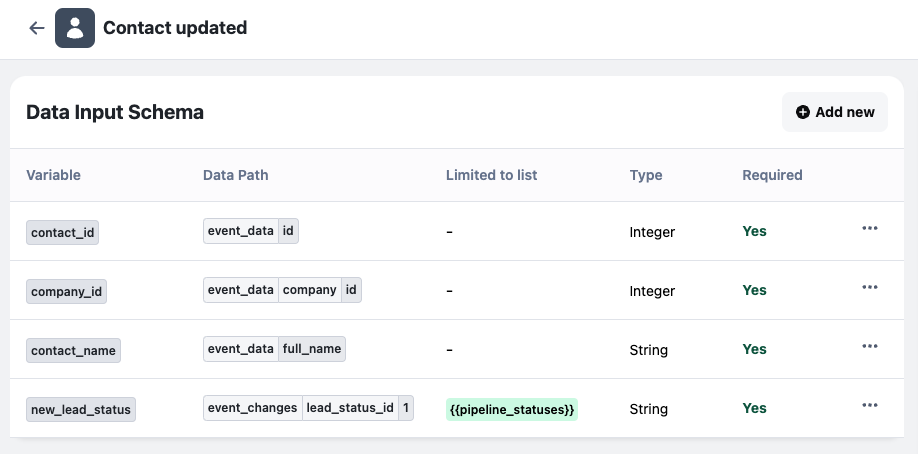
Setting Up the Trigger
- Navigate to Triggers
- Click on the “New Trigger” button
- Customize the trigger and the data input schema
- Save and Publish
Setting Up the Action
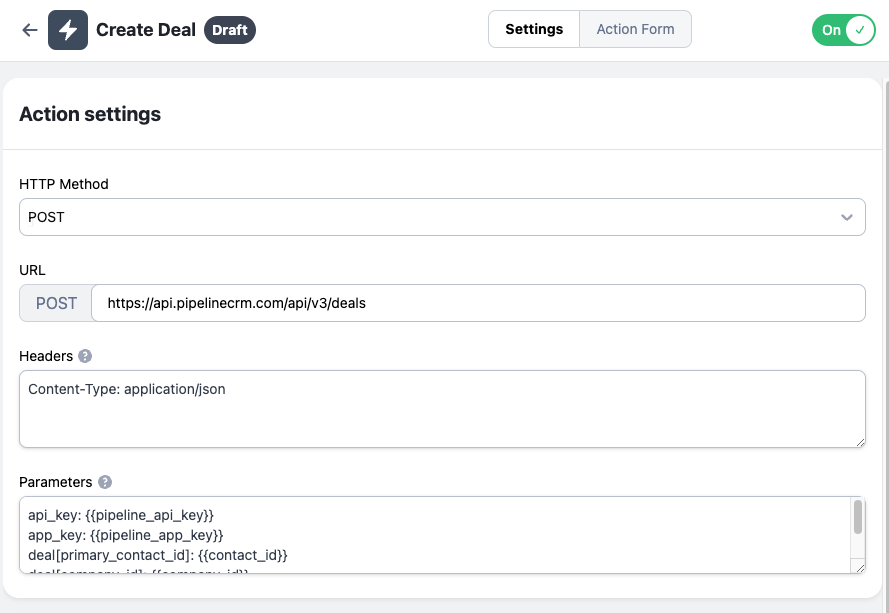
- Navigate to Actions
- Click on the “New Action” button
- Set up API endpoint URL, headers and parameters
- Set up Action Form
- Save and Publish
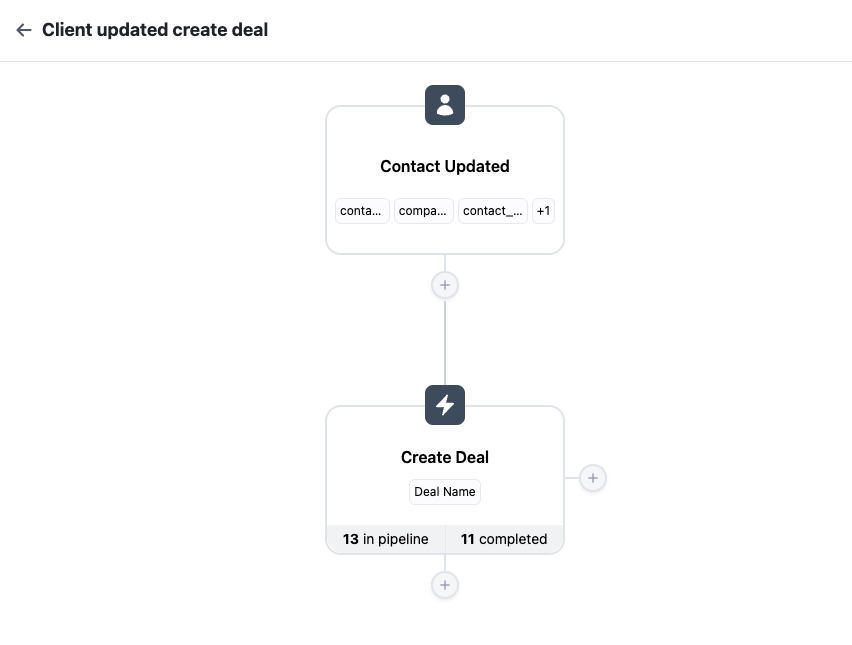
Setting up the Workflow
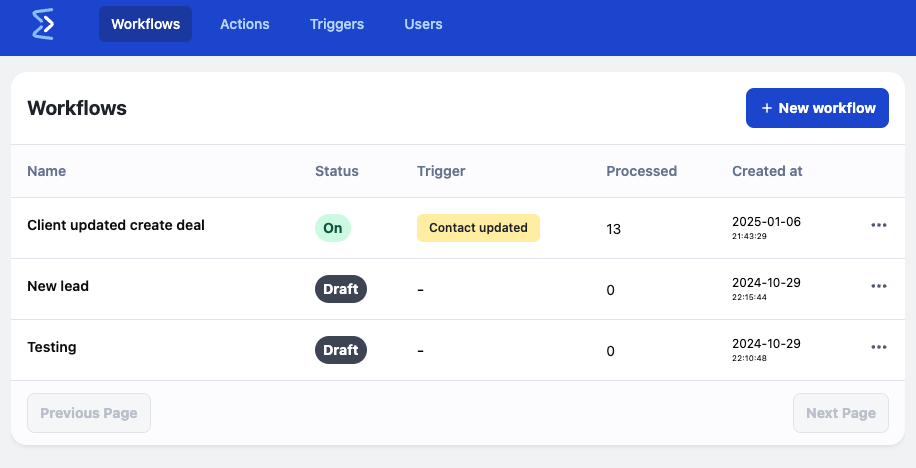
- Navigate to Workflows
- Click on the “New Workflow” button
- Set up the title
- Add “Contact Updated” Trigger
- Set up Trigger settings
- Add “Create Deal” Action
- Set up Action settings
- Save and Publish
Step 3: Watch Automation in Action
To trigger the workflow, we’ve set up a webhook using the Pipeline CRM API. This webhook listens for contact updates and sends the data to Embed Workflow to start the automation process.
- Trigger the Webhook:
- Update a contact in Pipeline CRM, which sends a webhook to Embed Workflow.
- Check the Embed Workflow Dashboard:
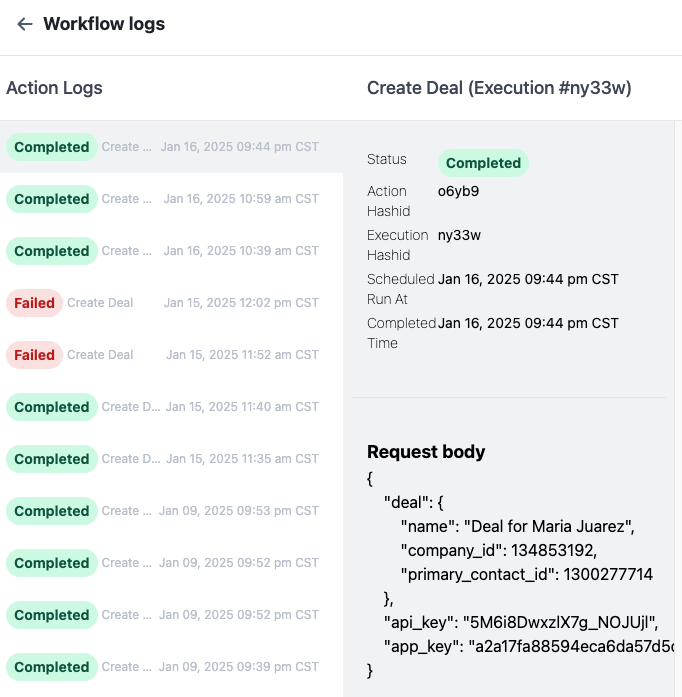
- Navigate to Embed Workflow’s Activity Log to confirm the trigger fired.
- Verify in Pipeline CRM:
- Refresh the Deals section and confirm the new deal appears with the correct details.

Conclusion
Embed Workflow is your secret weapon to transform automation in any app.
With a fast, seamless setup and powerful API integration, it takes your app to the next level—enabling you to:
- Automate workflows in minutes.
- Enhance user experience effortlessly.
- Scale your business with confidence.
Ready to embrace the future of automation? Visit Embed Workflow and schedule your demo today!