NOTE: The guide below is deprecated. Our product has come a long way since it was written. Please refer to our newer posts or schedule a demo!
This guide is for new users to learn how to use Embed Workflow.
Embed Workflow is an easy-to-use platform built with simplicity in mind.
A typical flow:
- set your data fields
- create and design your form using those data fields
- add actions to your workflow (slack notification, email, text message, webhooks, etc.)
- embed your form and start sharing it with people
We will do a quick walk-through of this flow.
Getting Started with Embed Workflow
1- Create a free Embed Workflow account
Let’s create a free Embed Workflow account for this guide. All you need is an email address to open an account. If you already have one, great, then log in and go to your dashboard.
Once you register, you should receive an email to confirm your account to ensure email notifications work as expected.
2- Create a Workflow
Click the “New Workflow” button from your dashboard and name it “Getting Started Review” (or whatever you like).
3- Add your fields
Navigate to “Fields” and add a Name, Email, and Message.

4- Create your form
Now head over to “Forms” to use the drag and drop form editor to create our Getting Started Form.
- Add the header “Getting Started Review”
- Add an image.
- Add Name, Email, and Message
- Save

5- Design your workflow
Once you receive a form submission, your workflow will begin. You can add emails, text messages, tasks, delays, slack notifications, etc.
Let’s add an email notification.
- Open the Workflow Builder.
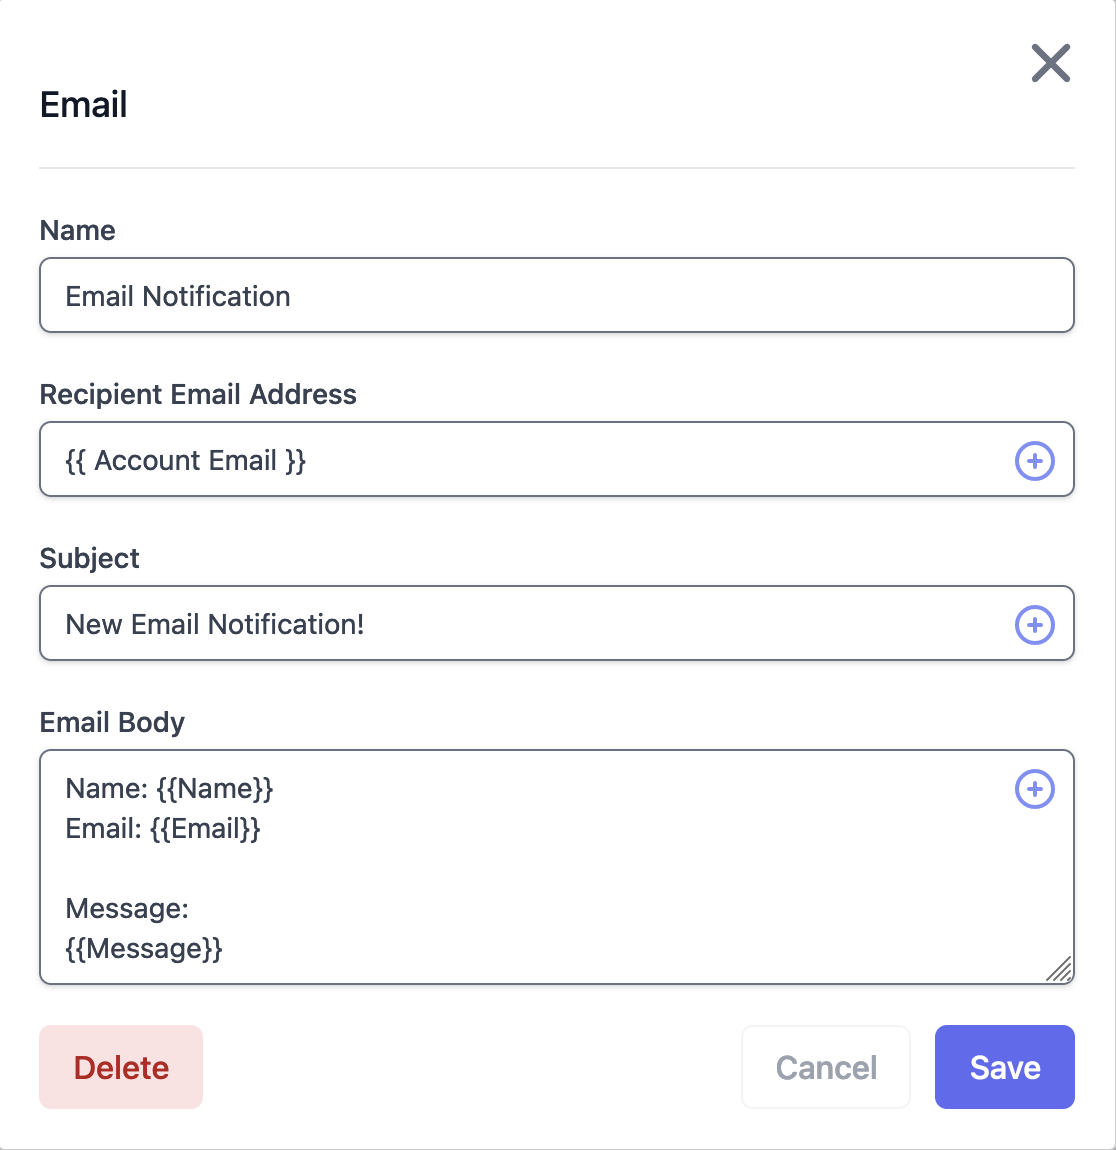
- Add an email action and name it Email Notification
- Edit the action
- Set Recipient Email Address to: “{{ Account Email }}” so we email ourselves.
- Set Subject to “New Email Notification!”
- Set Body to (Adjust tags if needed): Name: Email: Message:

6- Submit your form
Time to test our workflow! Head back to your form (Forms -> Getting Started Form). Copy the form URL and open it in a new browser. Fill out the form and submit!
https://embedworkflow.com/forms/YOUR_FORM_ID_HERE
In your workflow dashboard, you should see new data coming in.
Note: Don’t see it? Check if it was flagged as spam and ensure the workflow is set to Auto Start.
